|
You are not allowed to forward this
tutorial or to place it on any web site.
This tutorial is © Birgit - www.birgitja net - 2009
It's my own idea, any resemblance to another tutorial is purely coincidental.
But all graphics made by your self are yours.
I used PSP 9 , but other versions should work.
Materiale:
I have used 2. misted
tube and 1. brush.
All in zip-file.
But you are allowed
to use your own.
Save brush file in PSP's
Brushmap.
Open PSP.
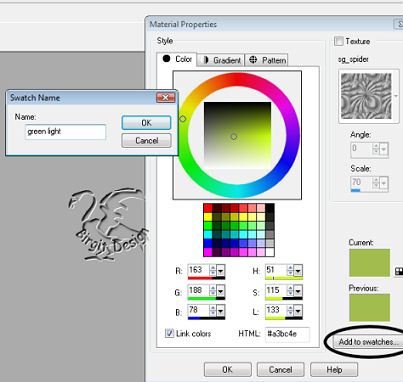
Go to materialbox and
Add to swatches.
Set forground to # a3bc4e
add to swatch and name it - green light.
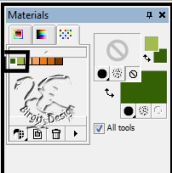
Then background # 346103 add to
swatch and name ir - dark green.
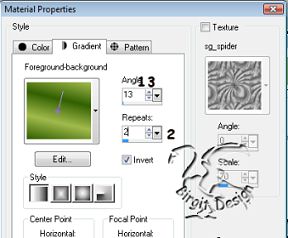
Now do a gradient
-foreground/background :
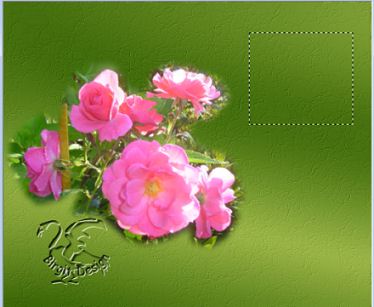
1.
File/New/New Image
600 x 500
transparent.
Flood Fill image.
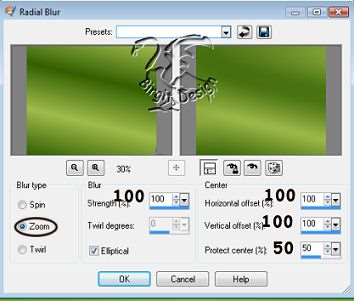
Go to
Adjust/Blur/radial Blur:
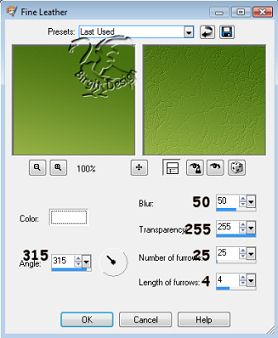
then to
Effects/Texture Effects/Fine Leather:
2.
Open Misted rose tube.
Edit/Copy, close it . On image
Edit/Paste/ Paste as New layer.
Resize 80%, Resize all layers
unchecked. Adjust/Sharpen.
Move it . Look at mine placement.
3.
New Raster Layer,
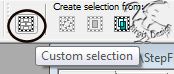
Go to
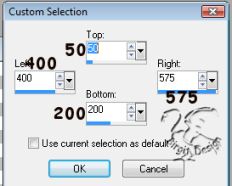
Selection Tool, then Custum Selection:
with these settings:
Now we have
this.
In Material Box, set background to
goldpattern and Flood Fill.
Selections/Modify/Contract to 7.
Press Delete
.
Deselect.
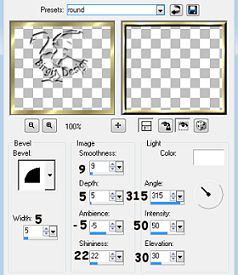
Selections/Select All, Selections/Float.
Effects/3D Effects/Inner
Bevel with these settings:
Deselect.
4.
New Raster Layer.
Use Magic Wand
inside frame.
Set Foreground to
gradient , same as before, but set
Angle 120 and Repeats 1.
Flood Fill
.
Open Misted epleblomst
tube and Edit/Copy.
On image Edit/Paste/Paste as New layer.
Resize 3 x
85%, Resize all layers uncheck,
Adjust/Sharpness/Sharpen.
With Mover Tool, move it inside
frame.
Now close layer 1 and 2.
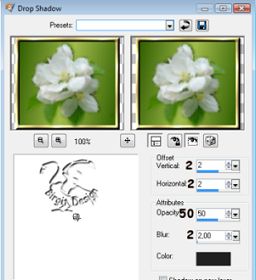
Merge/Merge visible frame layer.
Effects/3D Effects/Drop Shadow with these settings:
Repeat Drop Shadow but set vert,
and horiz.
-2.
Layers Duplicate.
Open closed layer and place duplicate
frame
a little
down, look at mine placement.
5.
New Raster Layer,
Use Paint
Brush and find -Spring Air -
In Material box set Foreground to goldpattern.
Set Brush below rose tube.
Effects/3D Effects/Drop Shadow as
before.
Merge/Merge all
layers.
6.
Image/Add Border 3 symmetric color #
37540e.
Image/Add Border 5 symmetric color
white ,
Selecter with magic wand and Flood Fill with goldpattern.
Deselect.
Image/Add Border 3 symmetric color #
37540e.
Selections/Select All -
Selections/modify/contract 7.
New Raster Layer, Effects/3D
Effects/Cut Out:
Repeat but change vert, and horiz,
-2
Deselect.
Put on your
Watermark or name.
Merge/Merge Visible.
Resize 85%,
Resize all layers checked.
Adjust/Sharpness/Sharpen.
This tutorial made
of me ©Birgit
12 Mai 2009
|