|

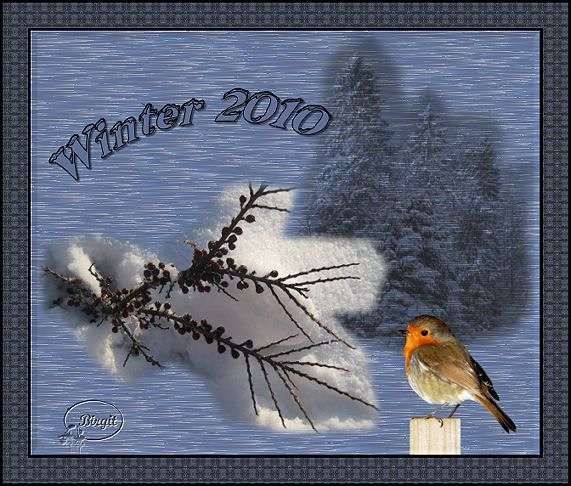
Here I have made a Winter Tag.
You are not allowed to forward this
lesson or to place it on any web site.
Do not claim as your own, but all graphics made by your self, are yours.
I have used PSP 9, but other versions should work.
MATERIALS:
1. misted tube - bj-vinter
1. tube - rodstrup-birgit
1. brush - bj-vinter10
Font - I have use Snowcap.
All in this
zip
You can also use your own tubes and font.
Filter- Freeware - Needles_Pins.
zip here
Open filter zip and save it in your plugins
folder,
before you open PSP.
Open material-zip and save tube in your own folder.
Save Brush in PSP's brush folder.
Open Font and minimize to Desktop.
Now open PSP. and we can begin.
Step 1.
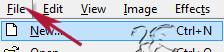
File/New/New Image:
set width 600 and height 500 transparent.

In material box set
foreground to #a2abbc and background to #748cb8.
Flood Fill Image with Background color.
Step 2.
Layers/New Raster Layer. Flood Fill with Foreground color.
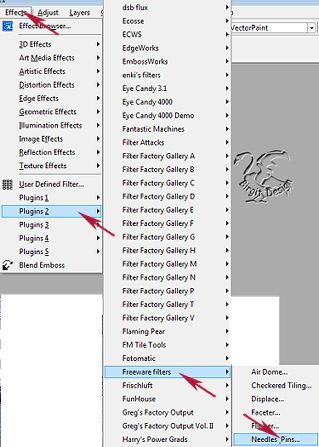
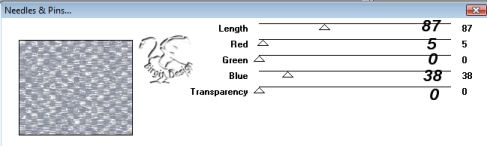
Go to Effects/Plugins/Freeware filters/Needles_Pins:
with this settings:
Step 3.
Open tuben bj-vinter. Edit/Copy close tube.
On Image Edit/Paste/Paste as New Layer.
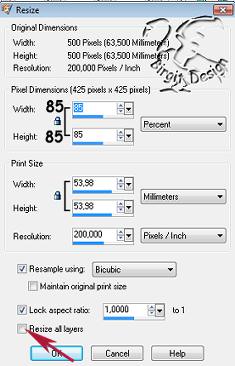
Image/Resize:
set to 85 % Resize All Layers unchecked:
Use Mower Tool

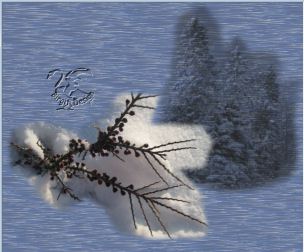
and place it. Look at mine placement.
Step 4.
Layers/New Raster Layer. Layers/Arrange/Move Down.
Set foreground color to #202020.
Go to Paint Brush:
find bj-vinter10 brush and set size to 400:

Set Brush on Image, like this:
Step 5.
In Layer palette, active top Layer.
Layers/New Raster Layer. Open rodstrup-birgit tube.
Edit/Copy, close tube.. On Image Edit/Paste/Paste as New Layer.
Resize five times of 85%, Resize All Layers unchecked.
Image/Mirror. Use Mover Tool and place it in right bottom corner.
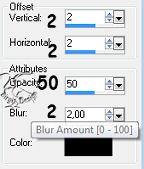
Effects/3D Effects/Drop Shadow:
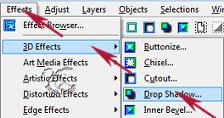
with this settings:
Step 6.
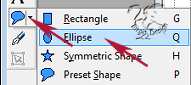
Now go to Preset Shapes/Ellipse:
set width to 2,00, create as Vector Foreground #000000 -
Background closed:

Make a Ellipse, where you want your text.
Now go to Text Tool:

Find the font you want to use. I Use Snowcap, size 40, stroke
1, Vector.
Foreground #000000 and Background #616f95

Set mouse on ellipse and you will see an A, click here and
type your text.
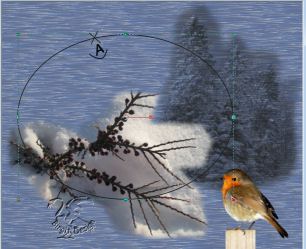
Here is mine:

When you are satisfied, go to Layer palette and open your
Vector Layer. Here close New Ellipse Layer.
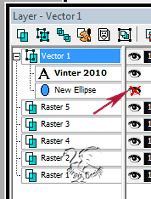
Right click layer and Convert to Raster Layer.
Use Mover Tool and place it where you want.
Effects/3D Effects/Drop Shadow , the same as tube.
Step 7.
Layers/New Raster Layer. Put on your Watermark or name.
Layers/Merge/Merge All (Flatten)
Step 8.
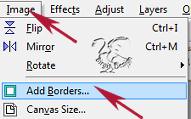
Now we will set on borders.
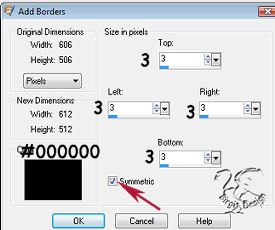
Image /Add Borders:
set to 3 Symmetric, color#000000:
Image/Add Borders and now set to 30 and color #ffffff
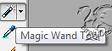
Grab Magic Wand:

Select Border.
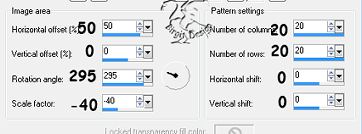
Effects/Reflection Effects/Pattern:
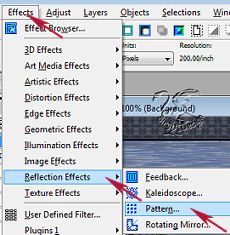
with this settings:
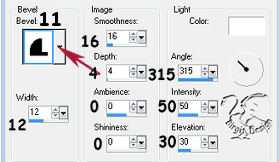
Effects/3D Effects/Outer Bevel:
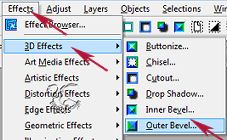
with this settings:
Selections/Select None.
Image/Add Borders set to 3 and color #000000:
Image/Resize 85 % Resize All Layers Checked.
Adjust/Sharpness/Sharpen.
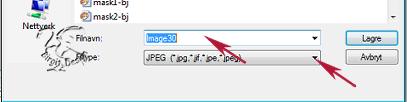
Now we are ready and can save as JPG.
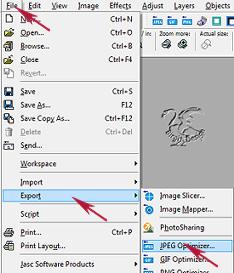
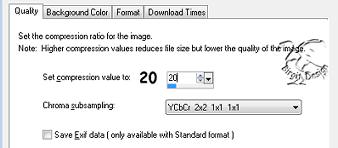
and give it a name.
Hope you are satisfied with result.
Thank you for trying .
Tutorial made by Birgit
February 2010
Tutorialer
~ ~ ~ Home ~ ~ ~ ~
Tag tutorialer
|